Author and technical review: WP Shelf. Checked on 7 November 2026 with the publicly downloadable Tagloom Free 0.27.0, on current and minimum supported WordPress/WooCommerce fixtures. The products and measurements shown are illustrative. No printer or scanner was used to make these pictures.
Start with an editable label
Download the editable SKU product-label example (JSON). It contains text, a separator and a Code 128 barcode. It uses no image attachments or paid features. Import it from WP Shelf → Tagloom → Templates → Template JSON file → Import template, then choose Open imported design. Import creates a new design; it does not replace an existing design or the default.
The example targets a 40 mm width and a 32 mm roll pitch. Its gap is deliberately unset: enter your real measurement before printing. These are starting dimensions for editing, not a recommendation to buy a particular roll or printer. Tagloom is for labels on goods; this example is not carrier postage.
Set the dimensions your roll actually has
- Width: the stock width across the printer.
- Roll pitch: from one label's leading edge to the next, including the gap.
- Gap: the measured space between label bodies. Enter an explicit 0 if your stock has no gap; do not copy a guessed measurement.
- Stock type: match the sensor mode to the loaded roll, such as opaque die-cut, transparent or continuous stock.
In the software capture, a 32 mm pitch − 2 mm illustrative gap = 30 mm body. The template keeps a 2 mm design margin. Your printer's usable head can be narrower than the physical roll, and its feed offset is a separate calibration. Review the printable window and any clipping messages; a partly cut barcode is not an acceptable label.
Bind the name and SKU, then choose a real product
The example's name element uses {{product.name}}. Its human-readable line uses SKU: {{product.sku}}, and the barcode value uses {{product.sku}}. Keep those bindings when you want each selected product to supply its own data. Literal wording stays the same on every label.
Use Preview with or Find preview product to choose a saved product or variation. This capture uses a synthetic Cedar candle with SKU CD-001. Check the selected record, not only the template's name. A variation may have different product data from its parent; inspect the resolved value you intend to print.
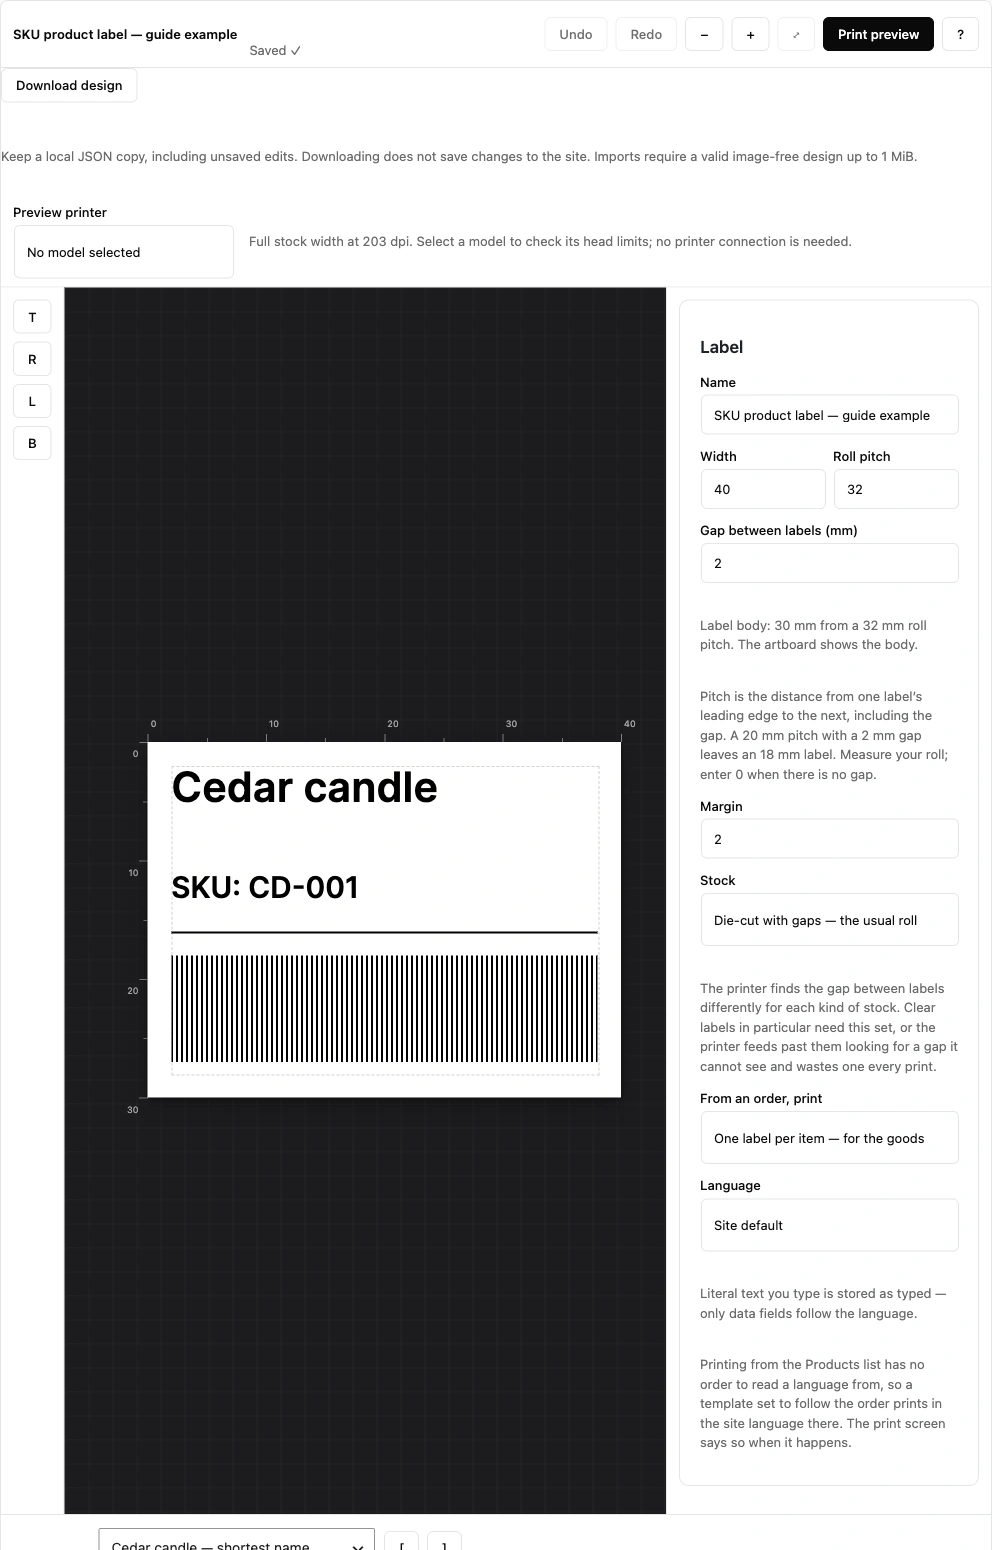
Inspect the actual software preview
Choose Print preview. Design view can show a generic barcode shape to help position its box. The bitmap preview contains the encoded bars and the value below them. In this example, the name, SKU line and barcode all refer to the same saved product.
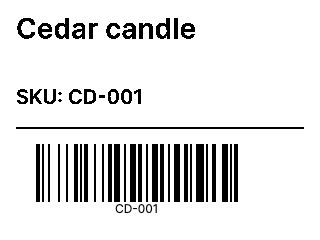
- Top: the product-name binding resolves to Cedar candle.
- Middle: the text binding resolves to SKU: CD-001.
- Bottom: Code 128 encodes that SKU and includes a human-readable value.
The same example produced byte-identical 320 × 240 previews on the two tested WordPress/WooCommerce runtimes. That establishes repeatable software rendering for this example. Before using labels on goods, check your actual model's head limits, test one label on the loaded stock and scan it in your own inventory workflow.
If the SKU or barcode is missing
An empty binding becomes empty output. In the released plugin, a product with no SKU can still be previewed: the barcode is omitted. Design view's generic bars are not proof that the selected record has a usable SKU. This example's literal SKU: prefix can remain while its value is blank.
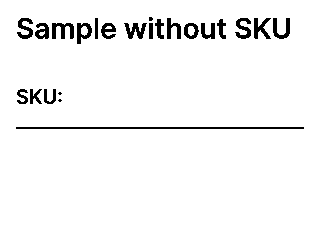
- Open the selected WooCommerce product or variation and check its saved SKU field.
- Enter the correct identifier and save the product. Do not substitute a made-up code just to make the preview look complete.
- Wait for the design to show Saved, or keep a local copy with Download design. Refresh the designer page, then select the product again so its saved data is read afresh.
- Open Print preview again and compare both the visible value and the barcode's human-readable line with the saved SKU.
WooCommerce's product documentation explains product and variation fields. If a populated barcode reports a width or encoding problem, correct its data or layout and keep the required clear space around the symbol. A successful preview still needs a physical test and scan.
Use the free manual path before automation
The released printing workflow targets desktop Chrome or Edge, HTTPS and Bluetooth, with WooCommerce active. Browser availability and page permissions matter: Web Bluetooth requires a secure context and can be restricted by page policy. An unavailable connection does not prevent you from reviewing the template and product data first.
When you are ready to try your own hardware, follow the published installation and loaded-roll instructions. A model appearing in a metadata list does not establish that it has been physically verified. Check size, feed, clipping and scanning on one free manual label. Some hardware also restricts compatible consumables; use the vendor's supported stock rather than trying to bypass those restrictions.
After checking the loaded roll, open WooCommerce Products, select one product and choose Bulk actions → Print labels. Pick the template and review the resolved data and count before following the page’s connection and print controls. A selection across multiple records is a separate Pro workflow.
Get Tagloom Free for the designer, templates and manual single-record workflow. Optional Pro licenses cover work across multiple selected records and unattended stations. They are separate from whether your own printer, roll and scanner pass a physical test.